
Phone Calls
Provides built-in application for Android phone calls, in some instances, we may need to make a phone call through our application. It can be done easily by using the built in intent with appropriate actions. In addition to this, we can use the PhoneStat Lastener and Telephony Manager Classes to monitor the changes in some of the telephony states on the device.
This chapter lists all the simple steps to make an application that can be used to make phone calls. You can use an Android intent to make phone calls by calling Android's phone call functionality. The following section tells us the intention to call different parts of the object.
Intent Object - Action to make Phone Call
You will use ACTION_CALL action to trigger built-in phone call functionality available in Android device. Following is simple syntax to create an intent with ACTION_CALL action
Intent phoneIntent = new Intent(Intent.ACTION_CALL);You can use the ACTION_DIAL operation instead of ACTION_CALL, in which case you will have the option of modifying the hardcoded phone number before calling directly instead of calling it.
Intent Object - Data/Type to make Phone Call
To make a phone call at a given number 91-000-000-0000, you need to specify tel: as URI using setData() method as follows −
phoneIntent.setData(Uri.parse("tel:91-000-000-0000"));The interesting point is that, to make a phone call, you do not need to specify any extra data or data type.
Example
The following example shows you practically how to use Android internet to make a phone call to a given mobile number.
To experiment with this example, you will need a real-world mobile device equipped with the latest Android OS, otherwise you have to fight with the emulator which can not work.
| Step | Description |
|---|---|
| 1 | You will use Android studio IDE to create an Android application and name it as My Application under a package com.example.saira_000.myapplication. While creating this project, make sure you Target SDK and Compile With at the latest version of Android SDK to use higher levels of APIs. |
| 2 | Modify src/MainActivity.java file and add required code to take care of making a call. |
| 3 | Modify layout XML file res/layout/activity_main.xml add any GUI component if required. I'm adding a simple button to Call 91-000-000-0000 number |
| 4 | No need to define default string constants.Android studio takes care of default constants. |
| 5 | Modify AndroidManifest.xml as shown below |
| 6 | Run the application to launch Android emulator and verify the result of the changes done in the application. |
Following is the content of the modified main activity file src/MainActivity.java.
package com.example.saira_000.myapplication;

import android.app.Activity;
import android.content.Intent;
import android.net.Uri;
import android.support.v7.app.ActionBarActivity;
import android.os.Bundle;
import android.view.Menu;
import android.view.MenuItem;
import android.view.View;
import android.widget.Button;
import android.widget.RadioButton;
import android.widget.RadioGroup;
import android.widget.Toast;

public class MainActivity extends Activity {
   Button b1;

   @Override
   protected void onCreate(Bundle savedInstanceState) {
      super.onCreate(savedInstanceState);
      setContentView(R.layout.activity_main);
      b1=(Button)findViewById(R.id.button);
      call();
   }

   private void call() {
      Intent in=new Intent(Intent.ACTION_CALL,Uri.parse("0000000000"));
      try{
         startActivity(in);
      }

      catch (android.content.ActivityNotFoundException ex){
         Toast.makeText(getApplicationContext(),"yourActivity is not founded",Toast.LENGTH_SHORT).show();
      }
   }

   @Override
   public boolean onCreateOptionsMenu(Menu menu) {
      // Inflate the menu; this adds items to the action bar if it is present.
      getMenuInflater().inflate(R.menu.menu_main, menu);
      return true;
   }

   @Override
   public boolean onOptionsItemSelected(MenuItem item) {
      // Handle action bar item clicks here. The action bar will
      // automatically handle clicks on the Home/Up button, so long
      // as you specify a parent activity in AndroidManifest.xml.

      int id = item.getItemId();

      //noinspection SimplifiableIfStatement
      if (id == R.id.action_settings) {
         return true;
      }
      return super.onOptionsItemSelected(item);
   }
}/
Following will be the content of res/layout/activity_main.xml file −
 xmlns:android="http://schemas.android.com/apk/res/android"
   xmlns:tools="http://schemas.android.com/tools"
   android:layout_width="match_parent"
   android:layout_height="match_parent"
   android:paddingLeft="@dimen/activity_horizontal_margin"
   android:paddingRight="@dimen/activity_horizontal_margin"
   android:paddingTop="@dimen/activity_vertical_margin"
   android:paddingBottom="@dimen/activity_vertical_margin"
   tools:context=".MainActivity">


      android:layout_width="wrap_content"
      android:layout_height="wrap_content"
      android:text="Drag and Drop Example"
      android:id="@+id/textView"
      android:layout_alignParentTop="true"
      android:layout_centerHorizontal="true"
      android:textSize="30dp" />


      android:layout_width="wrap_content"
      android:layout_height="wrap_content"
      android:text="Tutorials Point"
      android:id="@+id/textView2"
      android:layout_below="@+id/textView"
      android:layout_centerHorizontal="true"
      android:textSize="30dp"
      android:textColor="#ff14be3c" />


      android:layout_width="wrap_content"
      android:layout_height="wrap_content"
      android:id="@+id/imageView"
      android:src="@drawable/abc"
      android:layout_marginTop="48dp"
      android:layout_below="@+id/textView2"
      android:layout_centerHorizontal="true" />


      android:layout_width="wrap_content"
      android:layout_height="wrap_content"
      android:text="Call"
      android:id="@+id/button"
      android:layout_below="@+id/imageView"
      android:layout_alignRight="@+id/textView2"
      android:layout_alignEnd="@+id/textView2"
      android:layout_marginTop="54dp"
      android:layout_alignLeft="@+id/imageView"
      android:layout_alignStart="@+id/imageView" />
Following will be the content of res/values/strings.xml to define two new constants −
xml version="1.0" encoding="utf-8"?>

    name="app_name">My Application
    name="hello_world">Hello world!
    name="action_settings">Settings
Following is the default content of AndroidManifest.xml −
xml version="1.0" encoding="utf-8"?>
 xmlns:android="http://schemas.android.com/apk/res/android"
   package="com.example.saira_000.myapplication"
   android:versionCode="1"
   android:versionName="1.0" >

    android:name="android.permission.CALL_PHONE" />
    android:name="android.permission.READ_PHONE_STATE" />


      android:allowBackup="true"
      android:icon="@drawable/ic_launcher"
      android:label="@string/app_name"
      android:theme="@style/AppTheme" >


         android:name="com.example.saira_000.myapplication.MainActivity"
         android:label="@string/app_name" >


             android:name="android.intent.action.MAIN" />
             android:name="android.intent.category.LAUNCHER" />
Try to run my application. I think you are connected to your real Android mobile device with your computer. To run an app from Android Studio, open an activity file from your project and click the Run icon from the toolbar. Before launching your application, the Android Studio Installer will display the following window to select an option where you want to run your Android application.
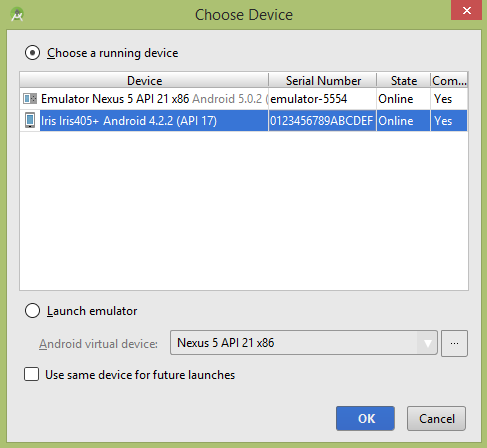
Select your mobile device as an option and then check your mobile device which will display call screen
Now use Call button to make phone call: